Showing posts with label MAC Cosmetics. Show all posts

Friday, May 23, 2014

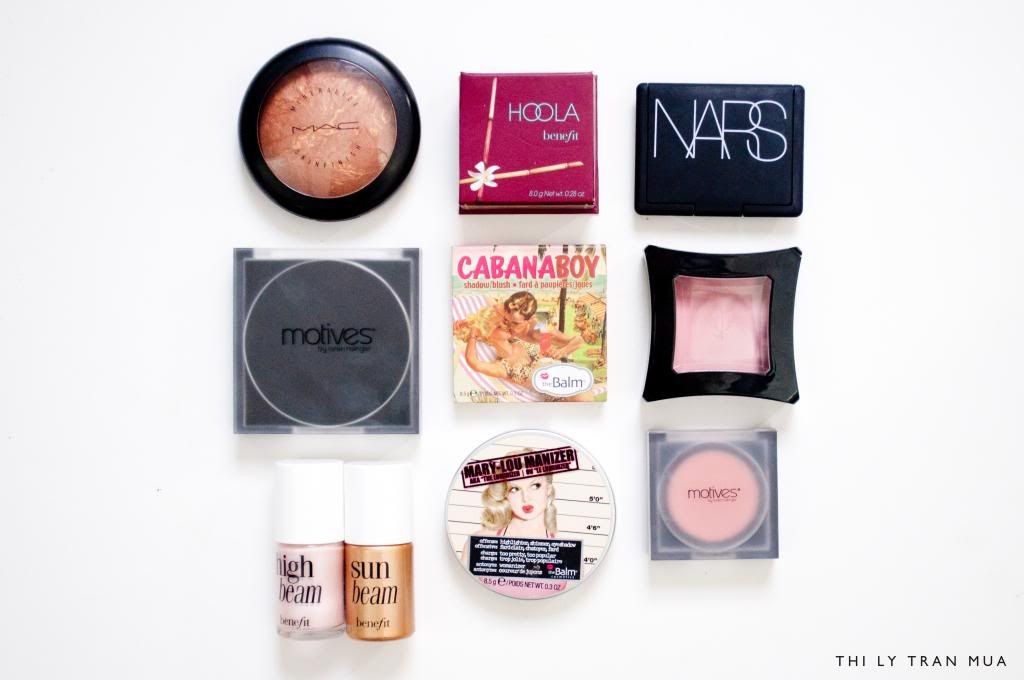
IN MY KIT #3: Cheeks // Bronzer, Blush & High Light

It was hard for me to put this post together as cheek products are always changing in and out of my kit, depending on what the makeup look is and what the clients skin is like. Important things to remember when you choose cheek products are the texture and finish of the product.

Shimmer: Dry/dull skin
Satin: All skin types
Matte: All skin types, best for Oily skin.

Liquid: Dry/normal skin
Cream: All skin
Powder: All skin, esp oily

If a client has oily skin, I will use mainly matte and powder type products as anything overly shimmery can accentuate the appearance of pores making them look enlarged and anything too emollient will not adhere well to the skin - plus as the day goes on, natural oils will seep through which will break down any foundation/blush/contour if it isn't properly prepped.  For dry skin, shimmery products can give the skin a more luminous and glowing affect. Generally if the skin looks too dry or matte it can actually make the skin appear more aged and tired, so keeping glow levels up on dry dehydrated skin types are more ideal.

These are just the guidelines I like to follow as they help keep my kit nice and condensed. Ideally I don't need to and don't want to carry 10 blushers or bronzers. But don't be afraid to try mixing and matching finishes/products to achieve different effects. Experiment!


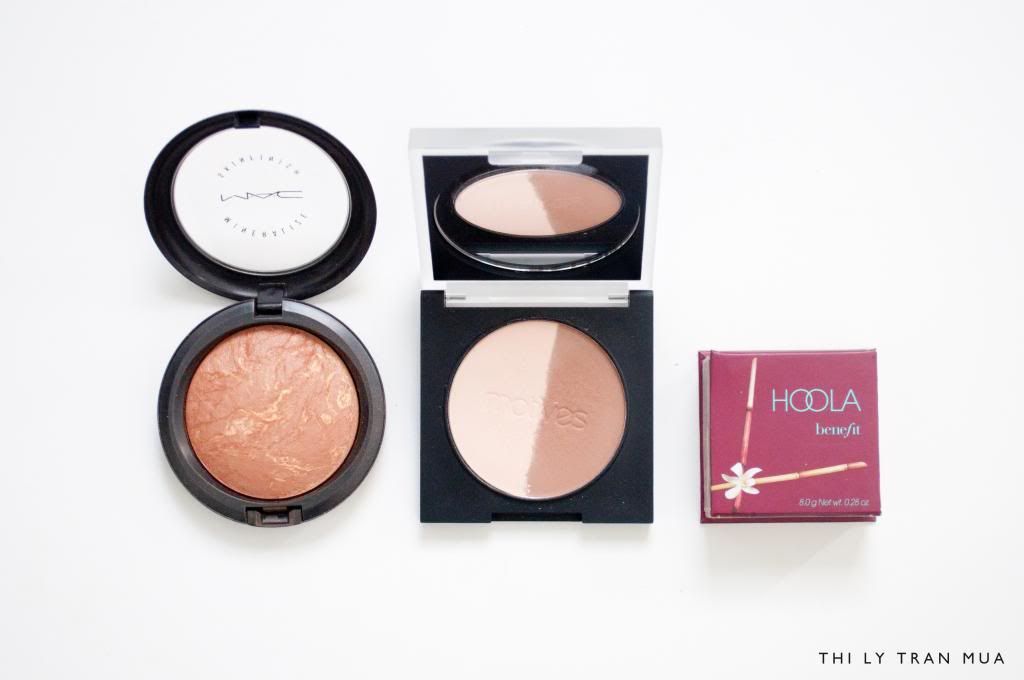
1. MAC Mineralise Skin Finish 'Comfort' (LE): Shimmering golden bronzer
2. Motives Shape & Sculpt Duo: A satin finish powder for contouring - cool toned
3. Benefit Hoola: Warm matte bronzer

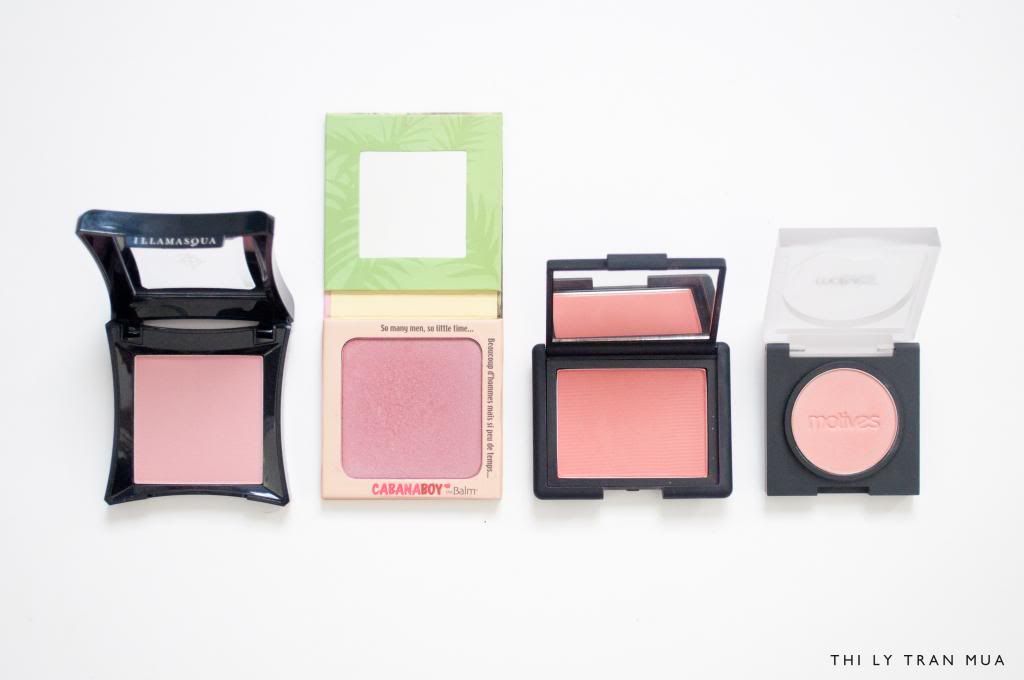
Above are the brands I like to keep in my kit but I don't always keep all of them in my kit at the same time. When choosing blushes, keep in mind the undertone of the blush, is it warm or cool?

1. Illamasqua Naked Rose Blush: Matte cool pink
2. The Balm Cabana Boy Blush: Shimmering golden purple 
3. NARS Gilda Blush: Matte warm peach
4. Motives Naughty Blush: Shimmering peach

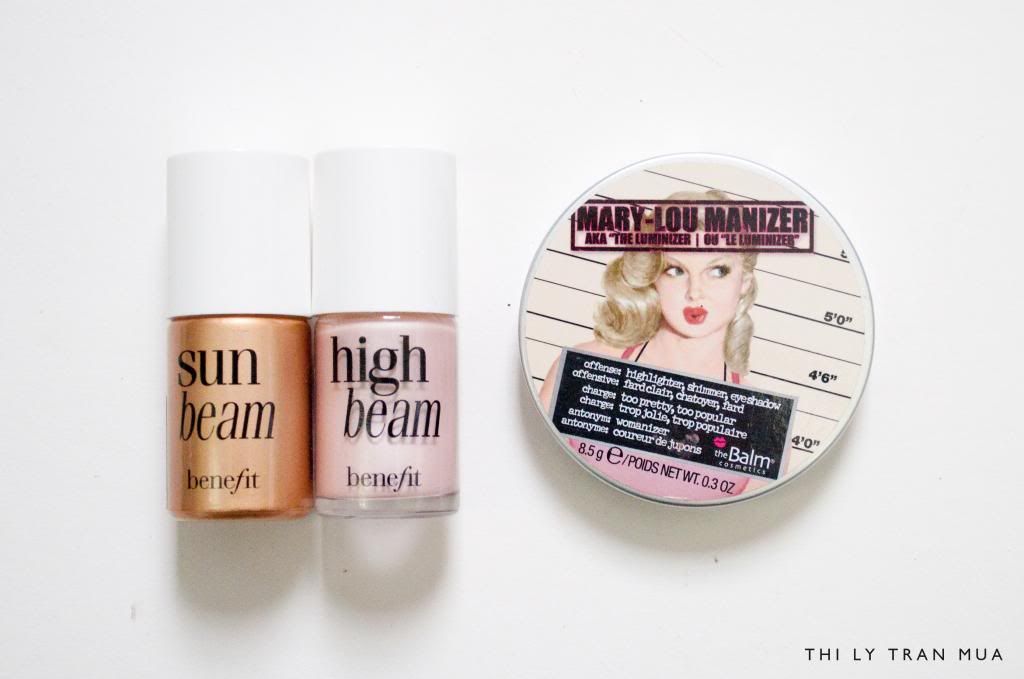
Highlights/illuminators are a super fun product, but they can be tricky. Too much and you could end up looking very oily/shinny. I keep both a liquid and powder in my kit for different reasons. A liquid is good for mixing with moisturiser or liquid foundation to give sallow/dull/dry skin the appearance of more hydration. Powders are good for all skin types, but are much easier to control when you need to add highlight to oily skin.

1. Benefit Sun Beam: Warm golden liquid shimmer.
2. Benefit High Beam: Cool pink liquid shimmer.
3. The Balm Mary-Lou Manizer: Champagne powder highlight. 


xx
Motives Cosmetics: thily
Instagram: thilytran
Facebook: thilytranmua
Email: thilymua [at] gmail.com

Monday, May 12, 2014

IN MY KIT #1: BASE


I think that the most important thing when it comes to Professional Photogenic makeup is the base, skin care aside, how you make the skin look in both real life and in photos is so important. Everything I have in my kit at the moment is tried and true, so I am confident that these products will give me the best finish and result.

*NOTE: I often mix and match my foundations to create different finishes and colours for different skin types and their needs. I also don't carry every single shade of foundation/concealer for space saving reasons. I will usually carry 2-3 shades of each and find that this is enough to cover a wide range of skin tones. Also, I usually cater to more yellow/golden undertone skins which is why my foundations run very yellow. I do have some pink tone foundations, but find that I rarely need to reach for them.*


PRIMERS//
1. MAC Strobe Cream (Travel Size): This is a multi-tasking illuminating cream that I love using mixed in with liquid foundation if the skin is a little dull. It gives a nice overall glow to the skin but isn't very greasy, so will work on most skin types.
2. Clarins Beauty Flash Balm: I often use this on dry dehydrated skin before a moisturising primer. I find it's really great at maintaining moisture on the skin without interrupting the makeup application.
3. Gorgeous Cosmetics First Base Foundation Primer: This is a lovely hydrating primer I use on almost everyone. It feels extremely comfortable and feels just like a light lotion.
4. Motives Cosmetics Perfecting Face Primer: This is a more silicone based primer which is good for filling in and smoothing out enlarged pores. I use this on normal-oily skin in the t-zone.

FOUNDATION//
1. Make Up Forever HD Foundation: I find this one is slightly thicker and more creamy so I would use this on normal dry skin types. Nice med-full coverage.
2. Gorgeous Cosmetics Base Perfect Liquid Foundation: My favourite liquid foundation because the coverage and texture is impeccable. Perfect in both real life and photos, never cakey or heavy. Only down side is that the colour range is not very good, so I mix a little bit of a lighter shade in to customise.
3. Cinema Secrets Foundation Palette: I use this on all skin types and use this for contouring too. Great compact foundation, very pigmented product, can look very natural on the skin and gives med-full coverage. I have this palette in a yellow tone and a pink tone.

  CONCEALER//
1. MAC Pro Longwear Concealer: Nice full coverage concealer, I keep three colours so I can use them to conceal and also highlight/contour.
2. Cinema Secrets Concealer Palette: A really good palette as it contains salmon tones and yellow tones to easily counteract any under eye darkness or skin pigmentation. Very similar to the foundation, but perhaps just slightly more creamy.


POWDERS+FINISHERS//
1. Ben Nye Banana Powder: Made famous by Kim K's MUA, I use this to set both the undereye and all over the face. A great affordable and versatile setting powder.
2. Ben Nye Neutral Set: I usually mix this in with the Banana Powder and rarely use it alone.
3. Motives Cosmetics 10 Years Younger Setting Spray: I find this really helps to eliminate any fine lines or wrinkles that the powder may accentuate and gives a really lovely glow to the skin that doesn't make the makeup slip or feel greasy. Made by Skindanavia who make their own + Urban Decay sprays which ensures quality but the Motives Sprays are a fraction of the cost.
4. Kiehls Lip Balm #1 Mint: I put this here because I usually slap on a thick layer after foundation to prep for lipstick. Putting it on 15-20 minutes before lipstick softens any dry patches on the lips and makes it really easy to scrub off for super smooth lips.

xx
Motives Cosmetics: thily
Instagram: thilytran
Facebook: thilytranmua
Email: thilymua [at] gmail.com

Wednesday, April 30, 2014

FOTD: Motives Cosmetics Formal Makeup

PRODUCTS USED

FACE//
Gorgeous Cosmetics Base Perfect Liquid Foundation 1Y-BP
Cinema Secrets Cream Foundation Palette (concealing, highlight, contour)
Ben Nye Banana Powder + Neutral Set
Motives Cosmetics Shape & Sculpt Duo
Motives Cosmetics: thily
Instagram: thilytran
Facebook: thilytranmua
Email: thilymua [at] gmail.com

MOTIVES COSMETICS: Naughty Blush Review & Swatches


So recently I signed up to become a Motives Cosmetics Rep - Don't worry, I won't be shoving their products down your throat. I'll tell you about my decision to join in another blog post, it's interesting I think! But anyway, I wanted to show you in this post the blush I received in my starter kit, Motives Cosmetics Blush in Naughty. The quality of this blush is incredible, the pigmentation and texture reminds me a lot of The Balm Blushes, but better!

PACKAGING: All the Motive Cosmetics compacts come in the same style, frosted plastic lid and a black base - not pretty, but not bad either. The basic packaging is functional and keeps the products nice and uniform and I can really appreciate that because it looks more professional in a makeup kit. The best thing about the packaging is that all the pans pop out with a tap, which is perfect for transfering them into larger palettes without hacking at the original packaging. One downside to the packaging is that when you take the pans out, they don't have name labels under the pans themselves which might lead to confusion later on when you go to put them back into their individual pots or even when you need to repurchase.

PRICE & AVAILABILITY: Price wise, these blushes are very affordable costing $17.95 AUD for 3grams of product; which is actually a lot more affordable than a lot of 'drugstore' brands here in Australia. Availability, it is only available online or if you have a local rep near you to show you some of the products.

QUALITY & FORMULATION: The texture of this blush is incredible, it applies smooth and the pigmentation is awesome. Naughty isn't powdery at all and feels very buttery. It applied onto the skin with ease, the texture is very similar to The Balm Powder blushes but much more smooth, there is no 'grit' to this blush at all. Whilst I was swatching it applied so easy, compared especially to my beloved Nars Blushes - Orgasm is the worst to swatch. This blush is made in the U.S.A which ensures top quality and production standard.

COLOUR COMPARISONS: So just looking at the swatches above, you can see that the Motives Blush in Naughty is a warm peach blush that ever so slightly leans pink, I was expecting it to look the most similar to MAC Blush in Style, but swatched Style didn't produce the same amount of pigmentation and had more golden shimmer. Pigmentation wise, it was most similar to The Balm Hot Mama, but Hot Mama swatches much more pink.

OVERALL: I am completely smitten with the blush formulation and can't wait to order more colours and with different finishes! The price point is perfect because it is affordable and offers a superior quality to other blushes of the same price and beyond. Definitely recommend the Motives Blushes & Shadows (saving this for another post) if you were thinking about trying out some of their products.


Any questions regarding any of their products, shoot me a message or email and i'll gladly try and help you as best as I can.

xx

Motives Cosmetics: thily
Instagram: thilytran
Facebook: thilytranmua
Email: thilymua [at] gmail.com

Tuesday, April 22, 2014

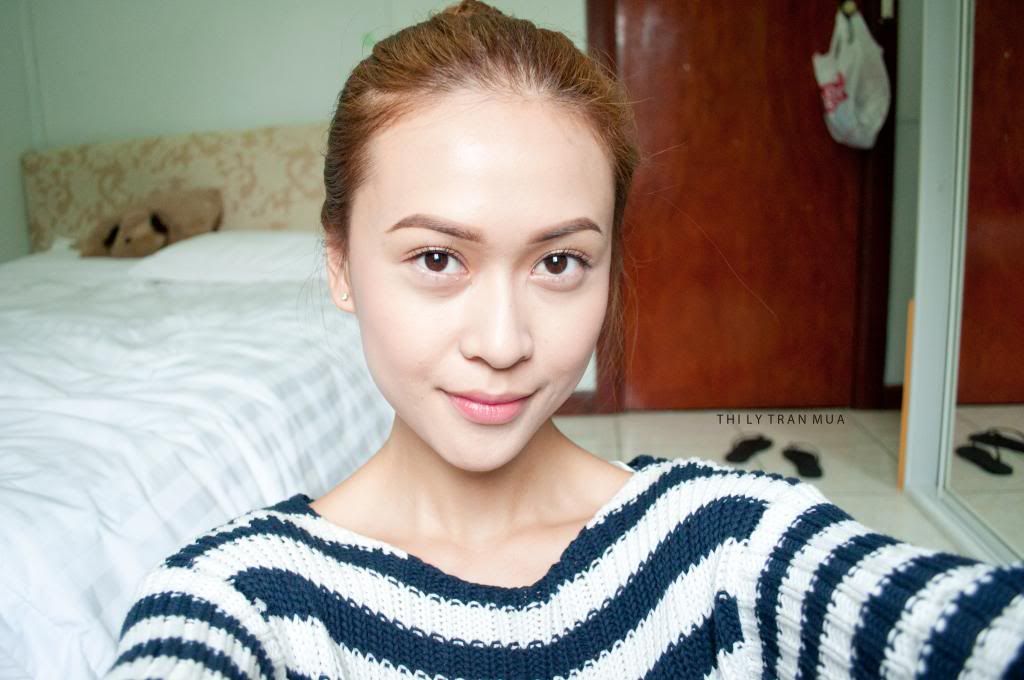
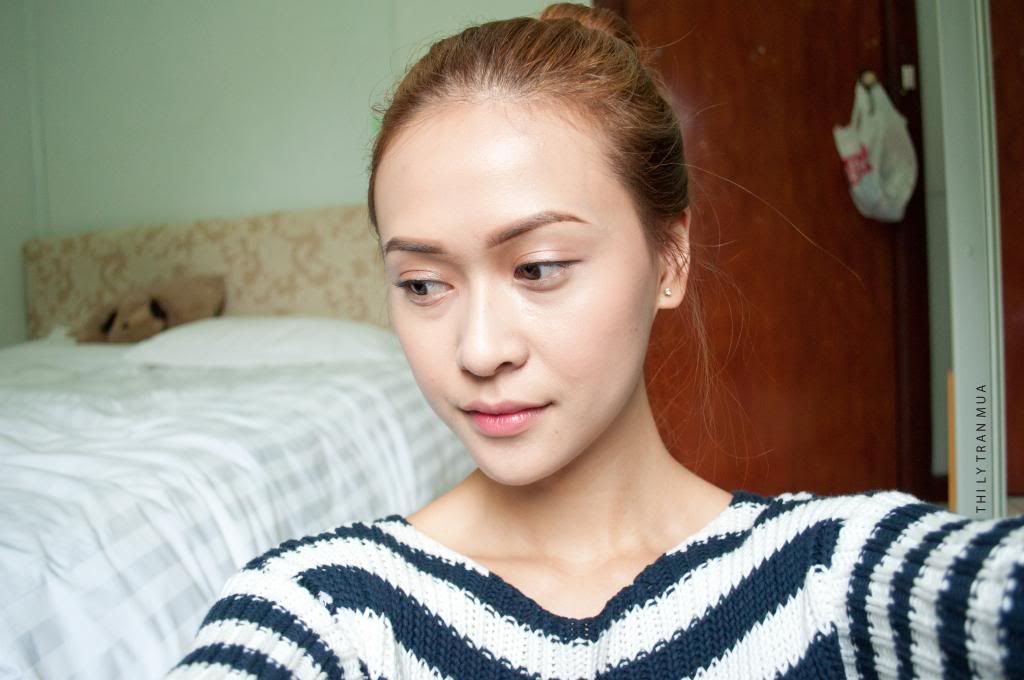
HOW TO: Fresh and Bright Asian Make-up


Being a long time Korean drama addict and a fan of K-pop (my guilty pleasures), I've always loved the way actors and celebrities in Asia were able to maintain a glowing youthful complexion that makes you wonder if they're even wearing any base makeup. Now that Australia is coming into the cooler seasons, I am finding that my skin is looking more dull and more dry - so it's now more than ever that I want to emulate a youthful and glowing complexion. In Asia there is a huge importance placed on pale milky skin and skin care - that's why you'll find so many ladies wearing giant hats, face masks and gloves up to their arm pits. Growing up in a western society, I've always loved a good tan and an even better bronzer, so exploring Asian make-up styles has been really refreshing.

BASE: To do this look, you want to make sure the condition of your skin is at its best, so maybe give yourself a light exfoliation and heavily moisturise before hand. I found that by mixing my brightening primer into my foundation, it gave me a brighter effect compared to if I had just layered the two products on top of each other. To emulate that really glowing and bright skin, you should reach for a foundation that is about 1 shade lighter than your skin and concentrate the product in the center of the face and lightly feather it out. This will give you the most natural bright effect, without seeming like you've just matched yourself to the completely wrong colour. Also, to really achieve this healthy dewy complexion, avoid or powder as minimally as possible.
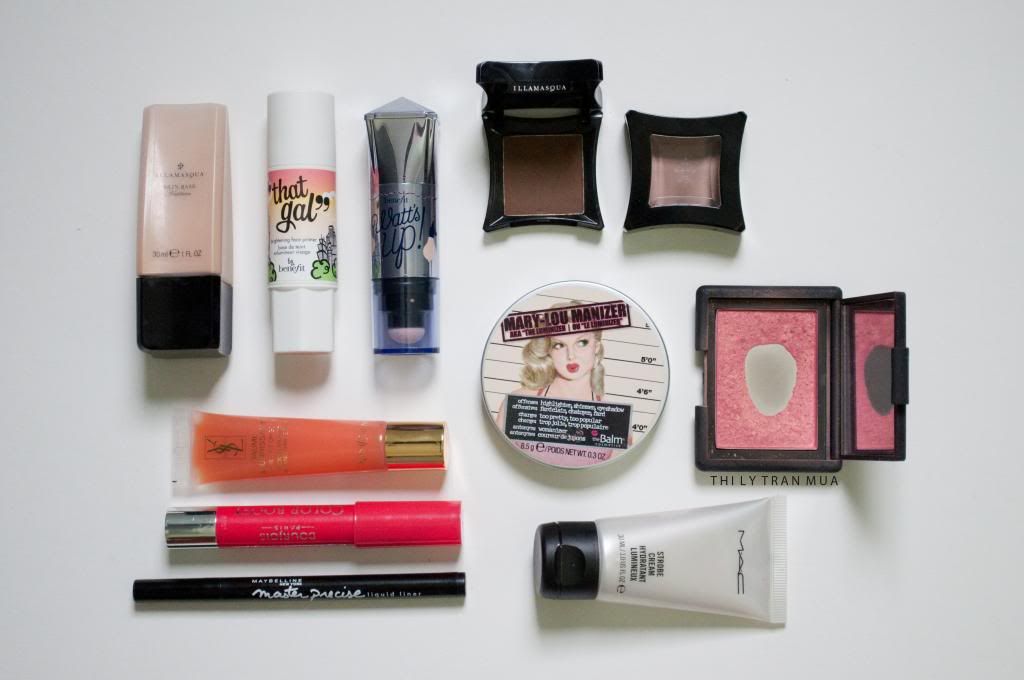
For this I chose to use my Illamasqua Skin Base Foundation and mixed it in with my Benefit That Gal Primer - you could also use something like M.A.C Strobe Cream or alternatively if your skin is oily you can use a highlight powder like The Balm Mary-Loumanizer or a natural cream product like Benefit Whats Up to spot highlight - remember it's a glow not an oily shine.

BROWS: You want to make sure you fill your brows in full and straight. This is supposed to give your face a very youthful and innocent look, arched brows aren't as popular in Asia and can sometimes make your face look aged or 'mean'. My brows are naturally arched so I wasn't able to get the brows to be as straight as I had wanted for this look, but by filling in the arch area a bit thicker, it definitely changed my brow shape and the way my face looked.
I mixed my trusty Illamasqua Brow Powder in Thunder with Illamasqua Eye Shadow in Heroine to give the brows a softer effect - I also brushed my hairs upwards with a brow gel to create a more lifted and full brow.

EYES: For this particular look, I went for very nude and innocent looking eye makeup to keep with the innocent and youthful image. All you need to do is apply a shimmering beige to the center of the lids and line your eyes down wards... Yes, down wards! By creating a very subtle line following the upper lid down (opposite of a winged cat eye, where you follow the bottom lash line up) it creates a droopy puppy eye effect, which is now very trendy and popular. It's supposed to make the eyes look more innocent, sweet and make the person look more approachable. You also really want to emphasize the lower lash line with a shiny shimmering product, this makes the eyes look like its watering and innocent.
I doubled The Balm Mary-Loumanizer highlight as a shadow for both the upper and lower lash line. To line my eyes I always use my trusty Maybelline Master Precise Liquid Liner, this always creates a fine line and is extremely easy to use. And never forget mascara, because that will seriously lift and open up the eyes.

LIPS: Gradient lips are a trend that Asian make-up artists really pioneered in my opinion. For so long i've seen K-pop idols and actors rocking a just bitten lip that looks so sexy, innocent and kissable all at the same time. It looks amazing in both matte and glossy finishes and today I went for the glossy finish to make the lips look extra supple and juicy. I find that by applying the lip balm/gloss on first then layering the lipstick or stain over the top makes the gradient more fluid and smooth.
I applied my YSL lip balm (maybe discontinued) all over the lips first, then took my Bourjois Colour Boost lip pencil dabbed and blended it into the center.


1. Prep skin with skin care (cleanse, tone, moisturise)
2. Mix liquid foundation and illuminating base together and apply in the center of the face
3. Lightly conceal any under eye circles and pigmentation if needed
4. Apply a shimmering blush to the apples of cheek and lightly blend back towards temples
5. Fill brows in create a nice full and straight shape
6. Apply a shimmering shadow to center of upper lids and all along the lower lash line
7. Using a liquid liner, thinly line the eyes down wards, following the upper lash line (down, not up)
8. Curl and apply mascara to both upper and lower lashes
9. Apply balm/gloss to lips first then dot a more pigmented lipstick/stain to the center of the lips
10. *Selfie*

In less than 10 steps you can easily achieve a clean, bright and polished makeup look. I'll definitely be rocking this kind of makeup look this winter. Give it a go, don't be shy and remember it is just makeup!

xx

instagram: thilytran
facebook: thilytranmua