Showing posts with label Benefit Cosmetics. Show all posts

Friday, May 23, 2014

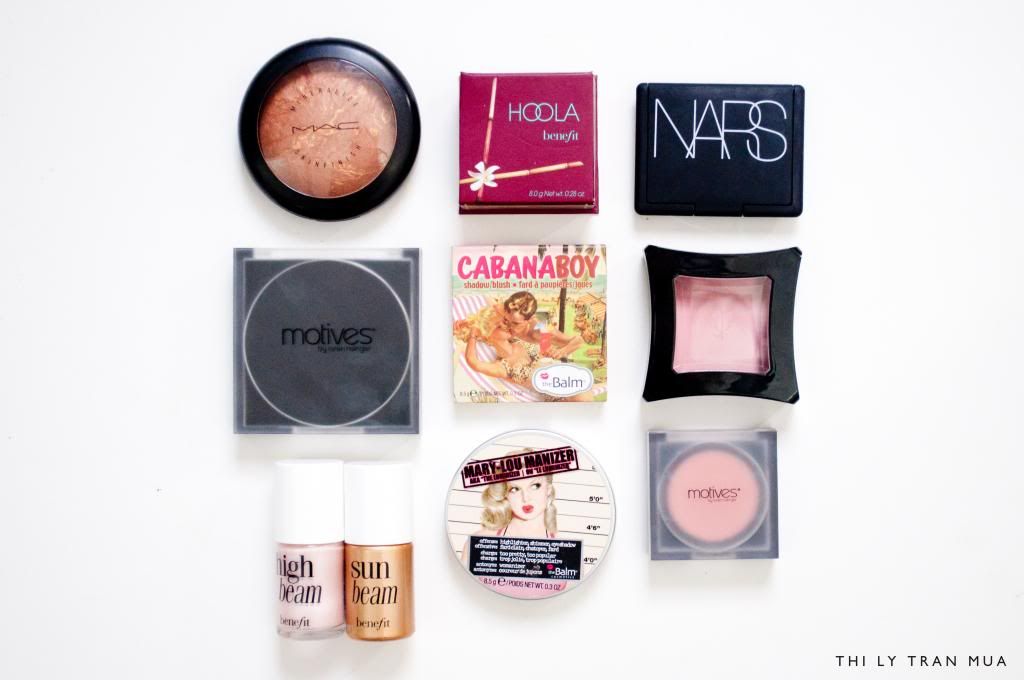
IN MY KIT #3: Cheeks // Bronzer, Blush & High Light

It was hard for me to put this post together as cheek products are always changing in and out of my kit, depending on what the makeup look is and what the clients skin is like. Important things to remember when you choose cheek products are the texture and finish of the product.

Shimmer: Dry/dull skin
Satin: All skin types
Matte: All skin types, best for Oily skin.

Liquid: Dry/normal skin
Cream: All skin
Powder: All skin, esp oily

If a client has oily skin, I will use mainly matte and powder type products as anything overly shimmery can accentuate the appearance of pores making them look enlarged and anything too emollient will not adhere well to the skin - plus as the day goes on, natural oils will seep through which will break down any foundation/blush/contour if it isn't properly prepped.  For dry skin, shimmery products can give the skin a more luminous and glowing affect. Generally if the skin looks too dry or matte it can actually make the skin appear more aged and tired, so keeping glow levels up on dry dehydrated skin types are more ideal.

These are just the guidelines I like to follow as they help keep my kit nice and condensed. Ideally I don't need to and don't want to carry 10 blushers or bronzers. But don't be afraid to try mixing and matching finishes/products to achieve different effects. Experiment!


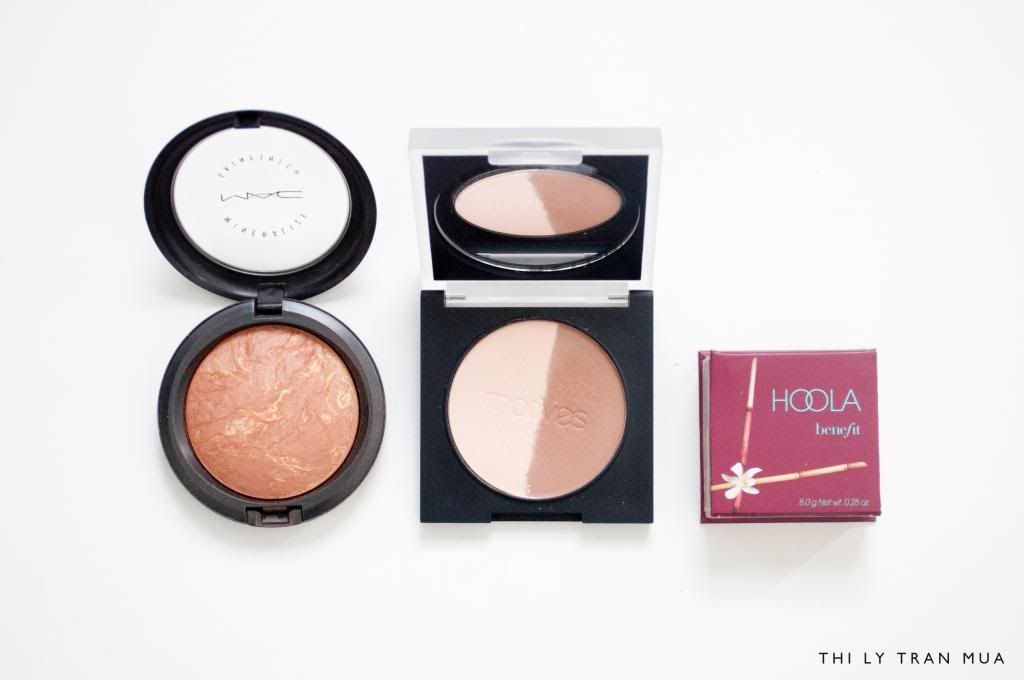
1. MAC Mineralise Skin Finish 'Comfort' (LE): Shimmering golden bronzer
2. Motives Shape & Sculpt Duo: A satin finish powder for contouring - cool toned
3. Benefit Hoola: Warm matte bronzer

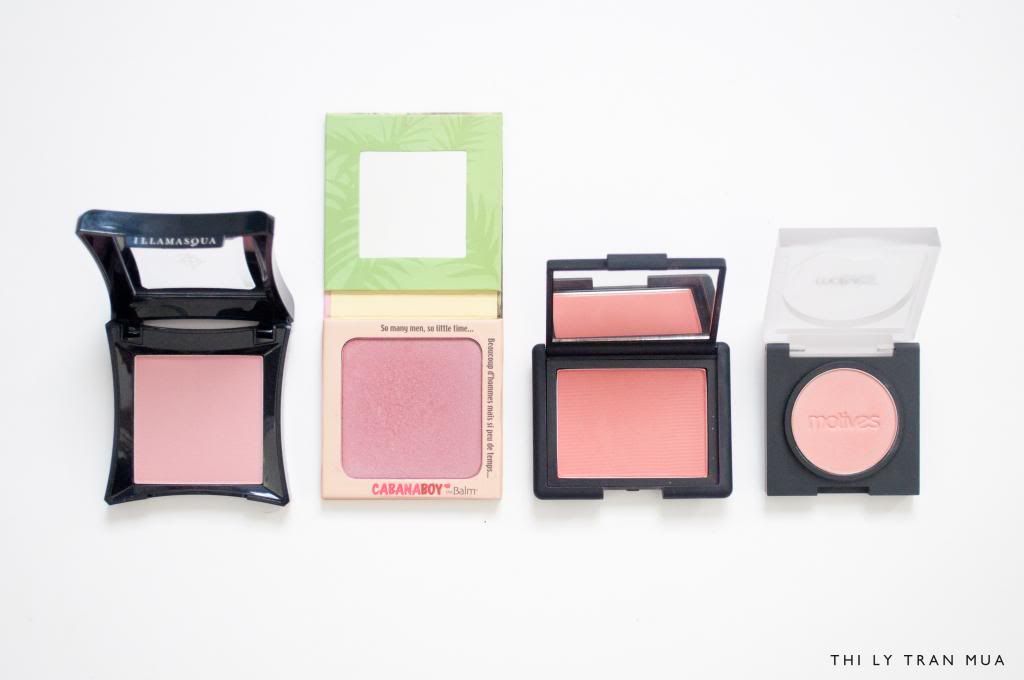
Above are the brands I like to keep in my kit but I don't always keep all of them in my kit at the same time. When choosing blushes, keep in mind the undertone of the blush, is it warm or cool?

1. Illamasqua Naked Rose Blush: Matte cool pink
2. The Balm Cabana Boy Blush: Shimmering golden purple 
3. NARS Gilda Blush: Matte warm peach
4. Motives Naughty Blush: Shimmering peach

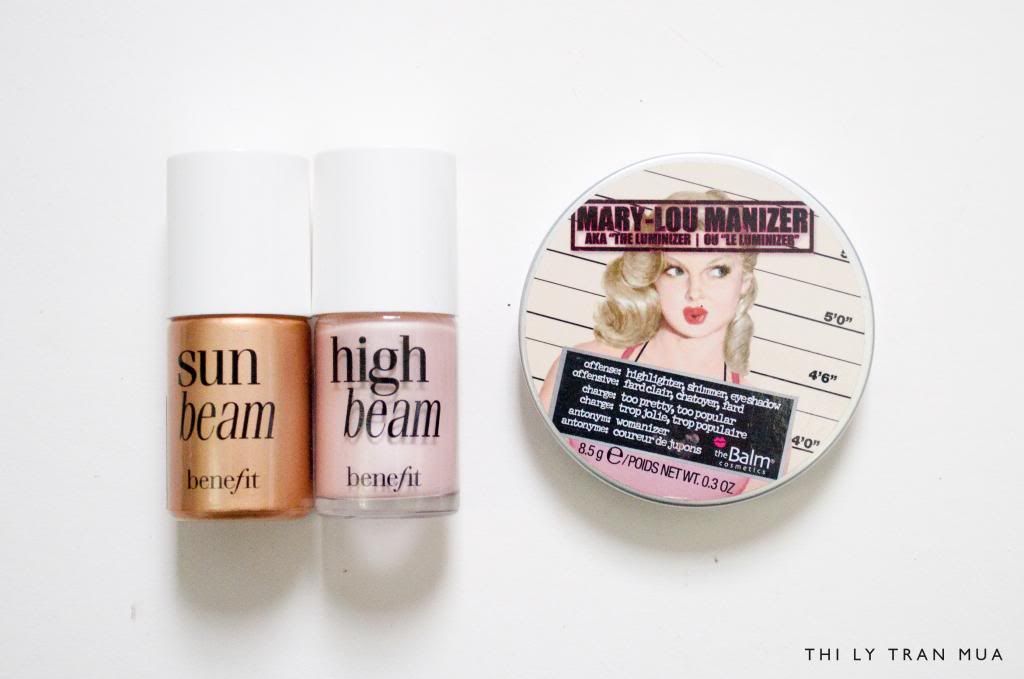
Highlights/illuminators are a super fun product, but they can be tricky. Too much and you could end up looking very oily/shinny. I keep both a liquid and powder in my kit for different reasons. A liquid is good for mixing with moisturiser or liquid foundation to give sallow/dull/dry skin the appearance of more hydration. Powders are good for all skin types, but are much easier to control when you need to add highlight to oily skin.

1. Benefit Sun Beam: Warm golden liquid shimmer.
2. Benefit High Beam: Cool pink liquid shimmer.
3. The Balm Mary-Lou Manizer: Champagne powder highlight. 


xx
Motives Cosmetics: thily
Instagram: thilytran
Facebook: thilytranmua
Email: thilymua [at] gmail.com

Friday, May 2, 2014

FOTD: Iggy Azalea

I was watching some Iggy Azalea on YouTube and loved her classic liner and bold lip combos! So here is my version, I enhanced the mole next to my lip for a little more authenticity.

FACE//
Gorgeous Cosmetics Base Perfect Liquid Foundation 1Y-BP
Cinema Secrets Cream Foundation Palette (concealing, highlight, contour)
Cargo Blu Ray Powder #30
Motives Cosmetics Shape & Sculpt Duo
EYES//

BROWS//
Benefit Gimme Brow
Prestige Brow Gel

LIPS//
Illamasqua Lip Pencil Titivate
Giorgio Armani Lip Maestro 504


xx
Motives Cosmetics: thily
Instagram: thilytran
Facebook: thilytranmua
Email: thilymua [at] gmail.com

Tuesday, April 22, 2014

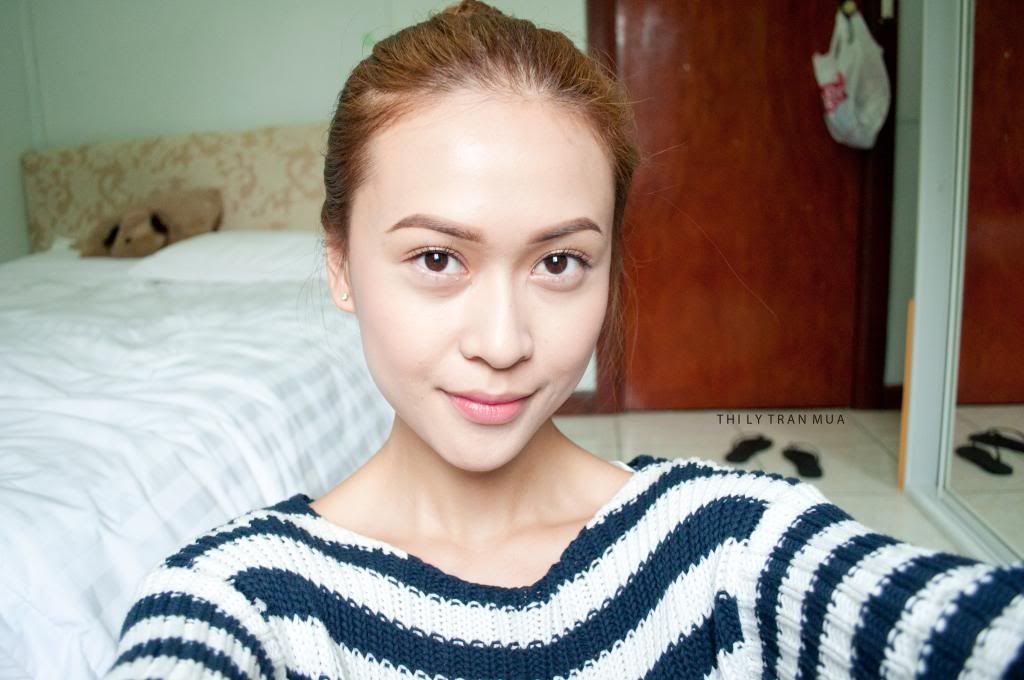
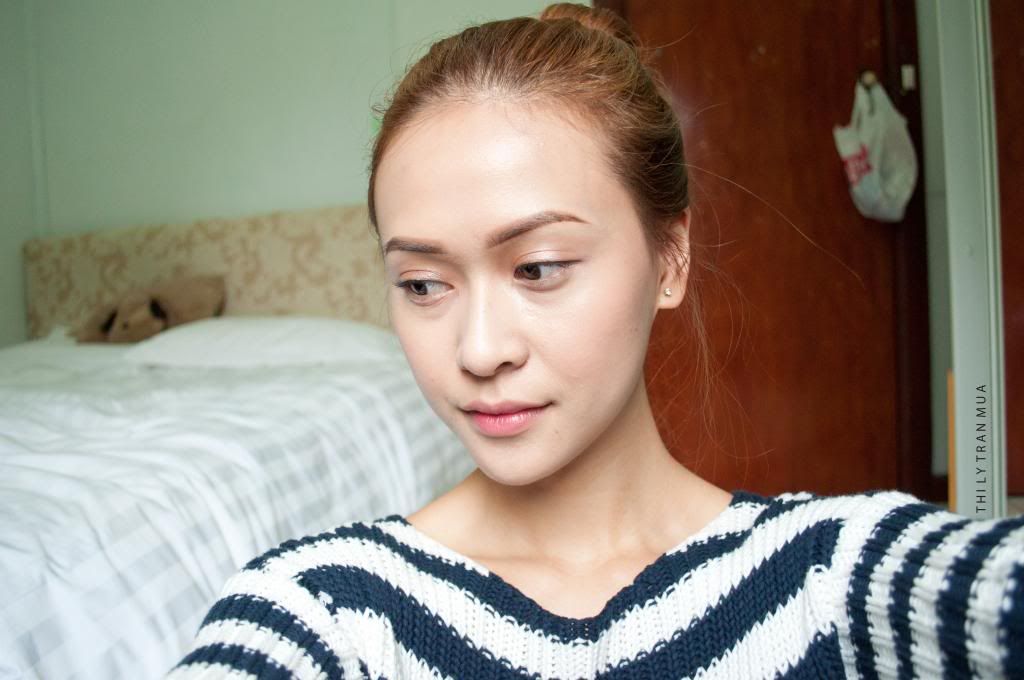
HOW TO: Fresh and Bright Asian Make-up


Being a long time Korean drama addict and a fan of K-pop (my guilty pleasures), I've always loved the way actors and celebrities in Asia were able to maintain a glowing youthful complexion that makes you wonder if they're even wearing any base makeup. Now that Australia is coming into the cooler seasons, I am finding that my skin is looking more dull and more dry - so it's now more than ever that I want to emulate a youthful and glowing complexion. In Asia there is a huge importance placed on pale milky skin and skin care - that's why you'll find so many ladies wearing giant hats, face masks and gloves up to their arm pits. Growing up in a western society, I've always loved a good tan and an even better bronzer, so exploring Asian make-up styles has been really refreshing.

BASE: To do this look, you want to make sure the condition of your skin is at its best, so maybe give yourself a light exfoliation and heavily moisturise before hand. I found that by mixing my brightening primer into my foundation, it gave me a brighter effect compared to if I had just layered the two products on top of each other. To emulate that really glowing and bright skin, you should reach for a foundation that is about 1 shade lighter than your skin and concentrate the product in the center of the face and lightly feather it out. This will give you the most natural bright effect, without seeming like you've just matched yourself to the completely wrong colour. Also, to really achieve this healthy dewy complexion, avoid or powder as minimally as possible.
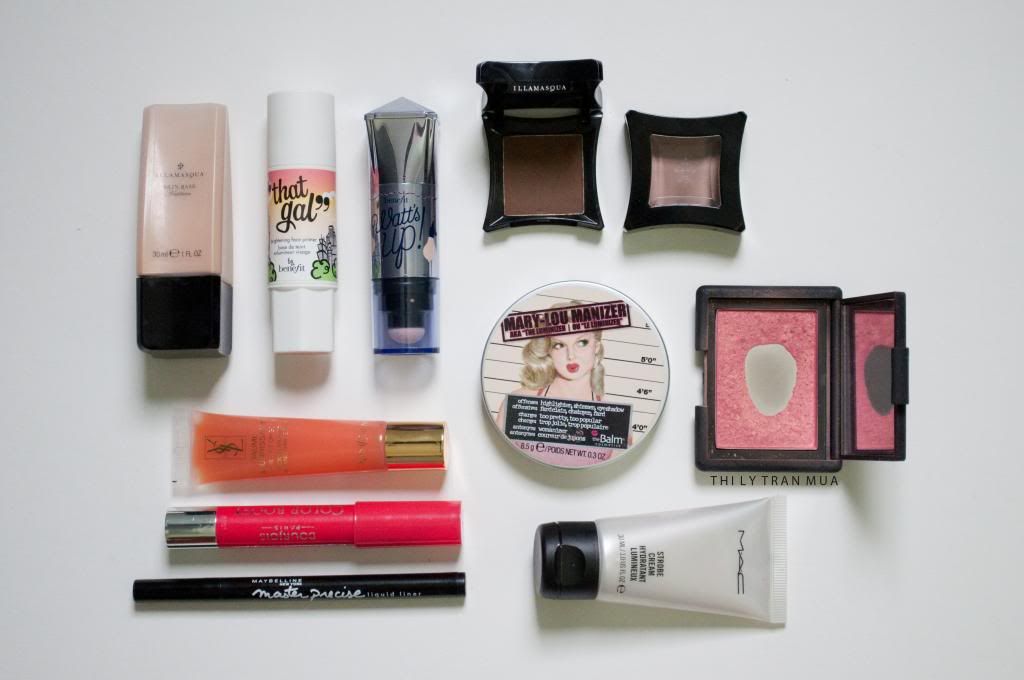
For this I chose to use my Illamasqua Skin Base Foundation and mixed it in with my Benefit That Gal Primer - you could also use something like M.A.C Strobe Cream or alternatively if your skin is oily you can use a highlight powder like The Balm Mary-Loumanizer or a natural cream product like Benefit Whats Up to spot highlight - remember it's a glow not an oily shine.

BROWS: You want to make sure you fill your brows in full and straight. This is supposed to give your face a very youthful and innocent look, arched brows aren't as popular in Asia and can sometimes make your face look aged or 'mean'. My brows are naturally arched so I wasn't able to get the brows to be as straight as I had wanted for this look, but by filling in the arch area a bit thicker, it definitely changed my brow shape and the way my face looked.
I mixed my trusty Illamasqua Brow Powder in Thunder with Illamasqua Eye Shadow in Heroine to give the brows a softer effect - I also brushed my hairs upwards with a brow gel to create a more lifted and full brow.

EYES: For this particular look, I went for very nude and innocent looking eye makeup to keep with the innocent and youthful image. All you need to do is apply a shimmering beige to the center of the lids and line your eyes down wards... Yes, down wards! By creating a very subtle line following the upper lid down (opposite of a winged cat eye, where you follow the bottom lash line up) it creates a droopy puppy eye effect, which is now very trendy and popular. It's supposed to make the eyes look more innocent, sweet and make the person look more approachable. You also really want to emphasize the lower lash line with a shiny shimmering product, this makes the eyes look like its watering and innocent.
I doubled The Balm Mary-Loumanizer highlight as a shadow for both the upper and lower lash line. To line my eyes I always use my trusty Maybelline Master Precise Liquid Liner, this always creates a fine line and is extremely easy to use. And never forget mascara, because that will seriously lift and open up the eyes.

LIPS: Gradient lips are a trend that Asian make-up artists really pioneered in my opinion. For so long i've seen K-pop idols and actors rocking a just bitten lip that looks so sexy, innocent and kissable all at the same time. It looks amazing in both matte and glossy finishes and today I went for the glossy finish to make the lips look extra supple and juicy. I find that by applying the lip balm/gloss on first then layering the lipstick or stain over the top makes the gradient more fluid and smooth.
I applied my YSL lip balm (maybe discontinued) all over the lips first, then took my Bourjois Colour Boost lip pencil dabbed and blended it into the center.


1. Prep skin with skin care (cleanse, tone, moisturise)
2. Mix liquid foundation and illuminating base together and apply in the center of the face
3. Lightly conceal any under eye circles and pigmentation if needed
4. Apply a shimmering blush to the apples of cheek and lightly blend back towards temples
5. Fill brows in create a nice full and straight shape
6. Apply a shimmering shadow to center of upper lids and all along the lower lash line
7. Using a liquid liner, thinly line the eyes down wards, following the upper lash line (down, not up)
8. Curl and apply mascara to both upper and lower lashes
9. Apply balm/gloss to lips first then dot a more pigmented lipstick/stain to the center of the lips
10. *Selfie*

In less than 10 steps you can easily achieve a clean, bright and polished makeup look. I'll definitely be rocking this kind of makeup look this winter. Give it a go, don't be shy and remember it is just makeup!

xx

instagram: thilytran
facebook: thilytranmua

Wednesday, April 9, 2014

Gorgeous Cosmetics - Primer and Liquid Foundation First Impressions


Gorgeous Cosmetics recently had a 40% off sale on their website and I bit the bullet and purchased the Gorgeous Cosmetics First Base Primer and 3 shades of their Base Perfect Liquid Foundation, with the intention of keeping them in my kit as a liquid foundation alternative to the creams I usually use. I did a quick Google search, as you do and there weren't that many comprehensive reviews. I think that's for two reasons, they aren't widely stocked and they aren't widely popular either - Gorgeous Cosmetic is quite a niche brand created by an Australia MUA aimed at pros, kind of like MAC minus the wide spread popularity.

The above picture was the first day I wore this for the whole day, I teamed it up with the primer and set the under eye area with a bit of Ben Nye Banana Powder. The consistency of the primer is nice and smooth, it feels really comfortable and nourishing like a moisturiser - really similar to the Clarins Beauty Flash Balm but a little less 'glowing'. The primer is also really different to 'pore minimizing' primers too, it doesn't feel like a tube of silicone. I really enjoyed this primer, which is really rare because if you know me, you'd know I almost never use primers on myself.

The coverage of this foundation completely floored me and the finish was absolutely amazing. I wore the colour BY-01 and the colour matched me perfectly (i'm about an NC-30 atm) and it just looked like I had naturally amazing skin. I no longer needed to cover up the broken capillaries on my cheeks and and uneven skin tones around my nose and chin area were covered up effortlessly - it also didn't cling onto any dry patches. It wore nicely throughout the day without making my t-zone oily.

I will be posting a comprehensive before and after review of this Primer & Foundation soon. But at the moment, I am completely loving it and am already considering purchasing another bottle of both!

FACE/ 
Gorgeous Cosmetics First Base Primer
Gorgeous Cometics Base Perfect Liquid Foundation (BY-01)
Cinema Secrets Corrector Palette
Ben Nye Banana Powder
Benefit Dallas Box Blusher
Benefit Hoola Box Bronzer
The Balm Mary-Loumanizer Highlighter
EYES/
Urban Decay Primer Potion
Shu Uemura M Soft Brown 851
Shu Uemura M Dark Brown 895
Shu Uemura ME Medium Plum 761
Shu Uemura ME Medium Brown 856
M.A.C Brule Shadow
The Balm Mary-Loumanizer Highlighter 
Loreal Telescopic Mascara
Ardel #110 False Lashes
Rimmel Scandal Eyes Bronze Liner
BROWS/
Illamasqua Brow Cake 'Thunder'
Cinema Secrets Corrector Palette
Benefit Gimme Brow Light/Medium
LIPS/
Revlon Pink Pop Gloss

xx
instagram: thilytran
facebook: thilytranmua